


Need to record the system audio and microphone audio on your computer? Enabling "Stereo Mix" will let you do exactly that, and here's how to do it.
Before using Amazing Screen Recorder to record audio on your computer, you are required to enable Stereo Mix first.
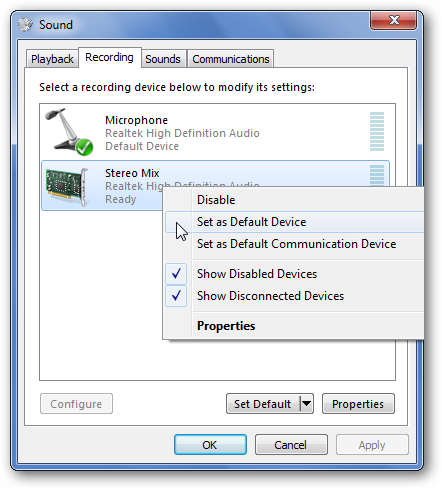
Enable Stereo Mix
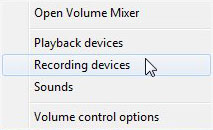
Go down to the audio icon in your system tray, right-click it, and go to "Recording Devices" to open up the proper settings pane.
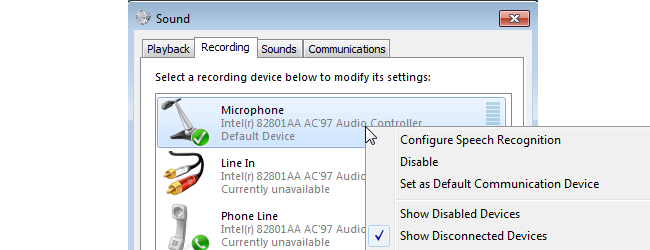
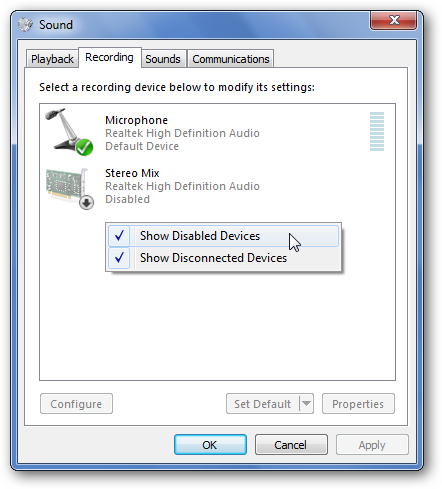
In the pane, right-click on a blank area, and make sure both "View Disabled Devices" and "View Disconnected Devices" options are checked. You should see a "Stereo Mix" option appear.
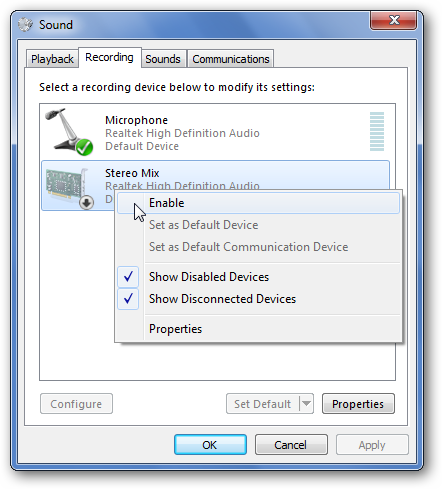
Right-click on "Stereo Mix" and click "Enable" to be able to use it.
I Still Don't See It?
In some cases, your audio chipset drivers aren't helping your cause. Most likely, this is because they're outdated. In other instances, however, it's because the newest Windows drivers for your chipset don't support this feature. This was the case on my Asus Eee PC (a 1000HE), but I got around the issue by downloading and installing the older Windows XP/Vista drivers for my audio chipset. As always, before changing your drivers, make sure create a system restore point in case things don't go as planned.
How Do I Use This?
With "Stereo Mix" enabled, you can open up your favorite recording program and select that instead of your microphone before you record. If you don't see the option, or your program doesn't give you the ability to change the recording device, you can disable or unplug your microphone and make "Stereo Mix" the default recording device.
This works well for when you want to capture audio for a screen-sharing session, or record audio from streaming sources–such as live web-casts–that don't necessarily allow you to download content immediately.